
In part one of this comprehensive guide, we will cover the essential equipment needed to verify rigid contact lenses. The parameters to verify are discussed, along with their ANSI standard tolerances for each. Whether you’re new to fitting RGP lenses or looking to refine your verification process, you’ll find practical tips to ensure your patients receive lenses that meet their exact specifications.
For Part 2 click here
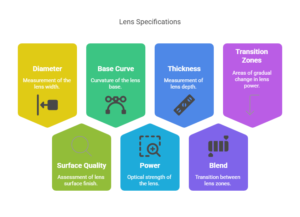
After receiving rigid lenses from the laboratory, the following parameters should be inspected for accuracy.
- Diameter
- Surface Quality and Edges
- Base Curve
- Power
- Thickness
- Blend
- Transition Zones
Diameter:
The lens diameter can be verified with a measuring hand magnifier, a diameter gauge, or one of the various types of projector inspection devices. Tolerance for an RGP lens is within 0.10 mm.
Surface Quality and Edges:
Lens quality and ediges can be assessed utilizing a measuring magnifier, projector inspection device, or through the use of the slit lamp.
Base Curve:
The base curve is most often measured utilizing a radiuscope. Base curves can also be measured using a keratometer with a special holder, called a Con-ta-chek, that allows the rigid contact lens to be held horizontally while the keratometer remains in its normal position. The base curve should be accurate to within 0.05 mm of specifications.
Power:
Back vertex power is measured with a lensometer. Tolerance is within 0.25 D of power specified with less than 0.12 D of uncalled for astigmatism.
Thickness:
Lens thickness is measured with a thickness gauge. Center thickness tolerance for a RGP lens is 0.02 mm.
Blend & Transition Zones:
These zones can be examined through the use of a hand magnifier, projector inspection device, or slit lamp.
Essential Equipment for RGP Lens Verification
To properly verify RGP lenses, you’ll need a few key pieces of equipment in your toolbox. While you may not need every instrument, having a good selection will allow you to thoroughly check all lens parameters.
Radiuscope
The radiuscope is considered the gold standard for measuring the back optic zone radius (BOZR). It uses the principle of reflected light to precisely determine surface curvature. While radiuscopes can be pricey, they are invaluable for getting accurate BOZR measurements, especially on more complex lens designs. The learning curve can be a bit steep at first, but with practice, you’ll be able to quickly measure both central and peripheral curves.
Keratometer
A standard keratometer can also be used to measure BOZR, though it’s not quite as precise as a radiuscope. You’ll need a con-ta-check to position the RGP lens correctly.
I often use the keratometer as a quick check before moving to the radiuscope for a more exact measurement. It’s a good option if you don’t have a dedicated radiuscope.
Corneal Topographer
For practices that have one, a corneal topographer can be a great tool for assessing the entire back surface geometry of an RGP lens. It provides a detailed map of surface curvatures across the lens. This is especially useful for complex designs like orthokeratology or scleral lenses. Just be sure your topographer is capable of measuring concave surfaces before attempting to use it on RGP lenses.
Measuring Magnifier
A measuring magnifier or loupe with an etched scale is essential for checking lens diameters and zone widths. Look for one with 7x or 10x magnification for the best results. This simple but indispensable tool is used to verify total diameter, optic zone size, and peripheral curve widths.
Thickness Gauge
You’ll use a thickness gauge or mechanical micrometer to measure center thickness. Digital gauges tend to be more precise, but analog versions work well too with practice. Accurately measuring thickness is crucial, especially for higher-powered lenses where oxygen transmission can be a concern.
Lensometer
A standard lensometer or focimeter is used to verify the back vertex power of RGP lenses. Be sure to use a special small-aperture stop designed for contact lenses to get an accurate reading.
Slit Lamp
While not strictly necessary for verification, a slit lamp is invaluable for inspecting edge design, surface quality, and overall lens geometry. The high magnification and varied illumination options make it ideal for detailed examination.
V-Gauge
This simple V-shaped measuring tool provides a quick way to check total diameter. While not as precise as a measuring magnifier, it’s handy for a rapid assessment.
Projection Magnifier
For practices that do a high volume of RGP fittings, a projection magnifier can be a worthwhile investment. It projects a magnified image of the lens onto a calibrated screen for easy measurement of multiple parameters. Having a well-equipped verification station will allow you to thoroughly assess every aspect of your RGP lenses before dispensing to patients.
In the first part of this comprhensive guide, we covered the key equipment needed to verify rigid contact lenses and the parameters that must be checked to ensure accuracy. Stay tuned for part two, where we’ll delve into the step-by-step techniques for properly verifying RGP lenses using these tools. For Part 2 click here
Ready to take your optical knowledge to the next level? Stay updated with the latest industry trends, news, and updates by joining our email newsletter. Don’t miss out—subscribe today and stay ahead in your optical career!